|
TIPS ON PHOTOGRAPHING MINIATURES images© & text© by Jennifer McKendry home page |
|
Equipment: a good digital camera with zoom
lens and flash); one or more studio
lights on stand or with a clamp; good picture processing software
in your computer; optional portable backdrops
(scaled to miniatures and/or dollhouses); good colour printer with high
quality photographic paper if you want to print the results; optional good scanner; optional
black or coloured fabric
to drape over object when scanning. Objectives: pictures which combine aesthetic appeal with clarity; for certain pictures, to create the impression "you are there", whereas other pictures are to provide as much factual information as possible One needs to take some time to
compose the scene and decide the angles to shoot from both as the
photographer (holding the camera above the scene, level with the scene -
which creates the "you are there" effect, etc.) and how the
miniature is positioned (parallel, foreshortened, side view, end view, etc.).
Are there accessories that may make the scene or main object more life-like
or interesting? such as dogs, cats, people, lamps, dishes, bouquets etc. see picture below
right I have the best results when
combining the camera’s flash with one traditional, studio flood-light
directed at an angle (the angle makes the scene more natural as in the sun’s
directional rays below right).
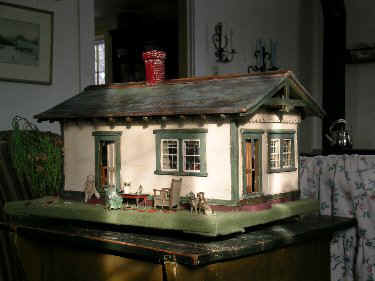
Sometimes sunlight hitting the object works (picture of dollhouse near the
bottom of this article)
but other times it creates too strong a contrast between highlights and
shadows.
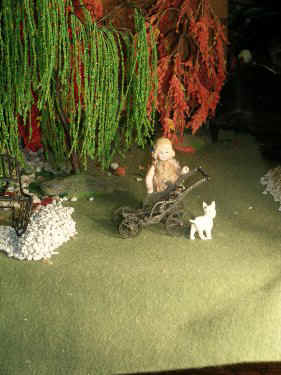
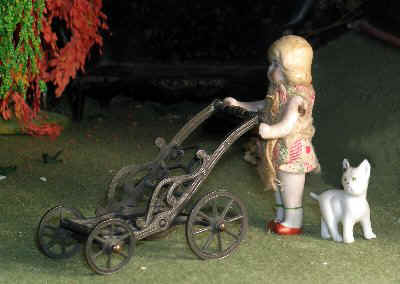
on the left, flat lighting
falls on the doll in an uncropped picture while, on the right, angled lighting
wraps around her, she is in a more interesting pose and close cropped -
giving the impression "you are there", in part because the camera
is at the same level as the subject; distracting elements in the background
were cloned out creating a dark shaded area merging into the middle ground For each image, I take 10 to 20
shots using both the “automatic” setting, which forces me quite a distance
from the subject (or else there is a focus problem) and “scene” (a
close-up setting, which may have a different name in other cameras), which
makes you move very close to the subject, although the focus can be hard to
control. The results aren’t all that
predictable and so I am prepared to retake after unloading the shots into my
computer and critically judging them on my computer screen. Therefore, do not
disassemble your scene until you are certain you have a satisfactory image. I could use a cable release and
tripod but find it awkward with tiny objects, even though I have a mini
tripod, as well as a regular one. I like the flexibility and speed of moving
the camera to different heights and angles without stopping to adjust a
tripod. Grip the camera firmly, brace yourself and suck in your breath to
minimize shaking, which will cause the image to be out of focus. The automatic setting means you may
have to crop away a lot of the setup (because you may be far away from the
miniatures depending upon how your camera works), which decreases the
potential pixels available for what is left (A below). If you have used the fine or high
function (with my camera, the results per picture are about 6 MB, which may
be cropped down to perhaps 3 MB), this may not be a problem, especially if
you want the image for the web. I save the cropped 3 MB image but, in
addition, I resize it (“save as” and then find “resize” or"image
dimensions" under "options": pick a "custom" size
such as 800 pixels wide) under
a different file name (in order to preserve the higher resolution
image) to a maximum of about 800 pixels wide (the other dimension adjusts
automatically; my webtables are 800 pixels wide) or
less if still too large for web use or unnecessary for the small size you may
want for a particular image on your web page – for the Gallery of Images,
each image is about 60 to 350 KB. On the other hand, detail and clarity are
important in portraying miniatures. For other articles, the web images have
even less KBs for speed in appearing to the user. For use in a publication
such as a newsletter or when making prints, you need high resolution: use the
3 MB version you severely cropped on “automatic” or 6MB with slight cropping
if on “scene”. One problem is an object obscuring
other objects in a miniature scene. This may only be apparent once you look
at the result on your computer screen. I then have to go back, make
adjustments and re-shoot. I may turn one chair from a set to face the viewer
(so that it can be more easily identified by the website user example shown below
under discussion about background panels),
even though the rest are in more natural positions, for example pulled into a
table. Items may need to be placed in contrived positions and angles in order
to be seen. Also a tiny object foreshortened may
look illegible in the final image, for example a little dog seen butt end may
have looked cute when you were arranging the scene but a question mark in the
final product. Again one has to re-shoot the scene after making adjustments. Once the picture is downloaded into
your computer, you still need to rotate (by a quarter turn if needed to
position vertically or by one or more degrees to create a level horizon),
crop, as well as adjust tint, light/dark and contrast to create the most
effective final image. With some picture software, the automatic feature for
adjusting the latter three can produce good results. Further changes,
particularly in cropping, may be needed once you drop the image into place on
the website.
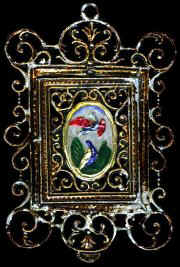
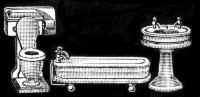
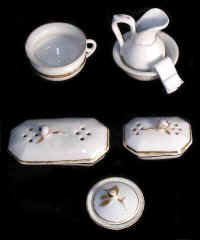
I have been experimenting with
scanning selected objects - especially if they are very tiny or detailed and
if the 3-deminsional aspect is not too important (right, 1½ inches
wide). The advantage is
the sharp final image. I place them on the glass of the scanner and then
drape them with black cloth (as my background in the Gallery is black). I
scan close cropped at a high resolution (800 to 1600 dpi if tiny). The black
appears grey in places because of the intense light of the scanner. I then
have to (after rotating, cropping, adjusting contrast, colour and saving)
paint in the black to get rid of highlights.
I sometimes find the outer edges of what looks like a black background
still show a glimmer of white when dropped into place on the website. I then
have to repaint them with black in that area or crop in slightly. If you want
a white background, you go with white cloth, paint etc. or drape with
coloured cloth. I am careful about letting the picture software automatically
adjust the bright and contrast when saving the scanned item – it sometimes
destroys a warm tone that I like. I use cloning whenever it is need to
make a picture more legible or increase its impact. I expect there are
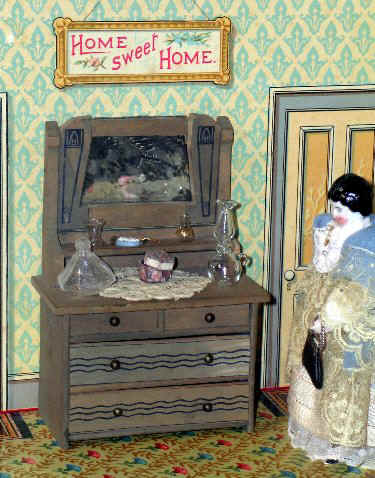
various views on whether this is ethical. One little bureau was missing its
top horizontal board, which I will someday replace. In the meanwhile, I
“created” it with cloning for my web image (below). Or a metal item with badly chipped
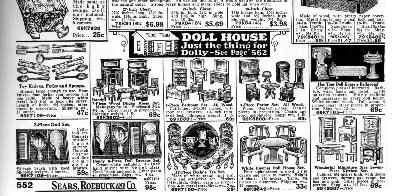
paint may “magically” have some paint restored. I also like to crop tightly
and wipe out (with paint or cloning or both) extraneous parts of historical
catalogue ads – again possibly an ethical issue (further below).
before cropping and cloning after cropping and cloning (note top horizontal board)
Another possibility is making
background panels, which can be adjusted for various scenes (below). Boards or strong cardboard can be
covered with various wallpapers with patterns appropriate to the scale of
miniatures being photographed (applied to both sides of the panel but with a
different pattern on each side to increase the variety of backgrounds);
usually a maximum of 12” high by whatever width you want (they represent the
walls of a room). At least 2 are desirable so that you can create corner.
They need to be supported by leaning against a wall or be thick enough to be
self-supporting. The “floor” can be a wooden table-top.
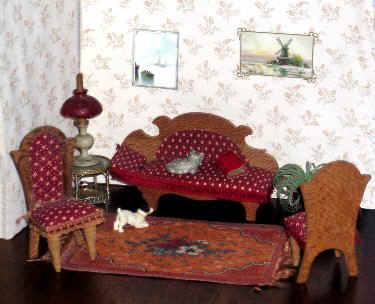
left: using
background panels, which appear as walls when close cropped (right); one
chair is turned to face the viewer to help in identifying it; the dog is
legible in this profile, slightly angled view whereas he is hard to
comprehend if foreshortened I have thought of using large
3-panel “hinged” art display foam boards (available in office supply stores)
in white or black to place behind dollhouses, which otherwise may have too
busy a background. I have painted out such backgrounds but it is a lot of
work. Even with the foam boards, you will need to touch up the background
with paint to eliminate the hinge lines and even out the shadows and
highlights created by the camera flash and studio light but it is less work
than painting around every detail of the subject's edges. Whether or not to paint out the background
(usually in white unless the website background happens to be black) can be
decided case-by-case. I do this either to clarify the object because the
background is too confusing or for aesthetic reasons. Variety may be more
interesting than everything appearing with its real background or everything
with a monotone background. Depending upon your picture software, you may
find painting easier than trying to outline by cropping, especially when
there are lots of curves and small spaces. Remember to zoom in when painting
a difficult area. You may have a combination of real and painted backgrounds
in the same picture, for example, a stable in a farm scene setup on a table
may have, in the backdrop, vegetation, buildings, animals etc. and thus look
natural but a part of the background might also show the rest of the real
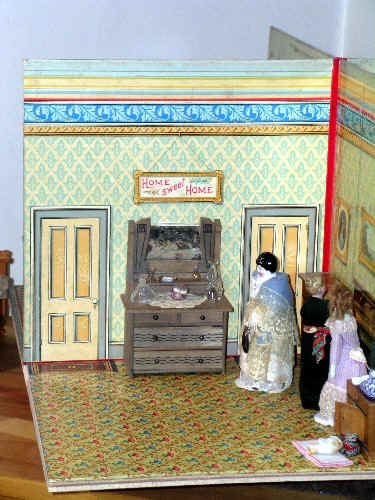
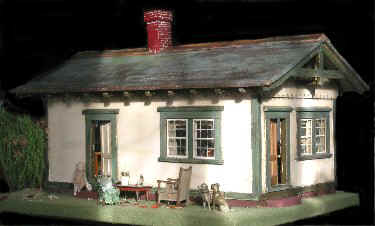
room, which would be less distracting if painted out. Or a dollhouse may be
more emphatic if there are fewer distractions in the background and if there
is less contrast in scale between the real room and the dollhouse (below).
the original photograph after cropping and then painting out the background
So, all in all, it is a time consuming, hard process! And a “learn as you go”. Although folks are inclined to assume your success all depends upon what camera you use, that is only one aspect. There is as much work in processing the picture in the computer as there is in taking the picture. top of page home page history of DOLLHOUSES GALLERY of IMAGES 1 DOLLS for DOLLHOUSES 1 list of articles on antiques |